How To Hang your Vinyl Backdrops (Tutorial)
Yeah!! You are finally taking steps to make your life easier!

The vinyl backdrops we will be using today are Club backdrops. They have two different sizes available. We will focus on the larger 90 x 120cm backdrop for most of the tutorial.
60 x 90cm (2 x 3ft)
90 x 120cm (3 x 4ft)
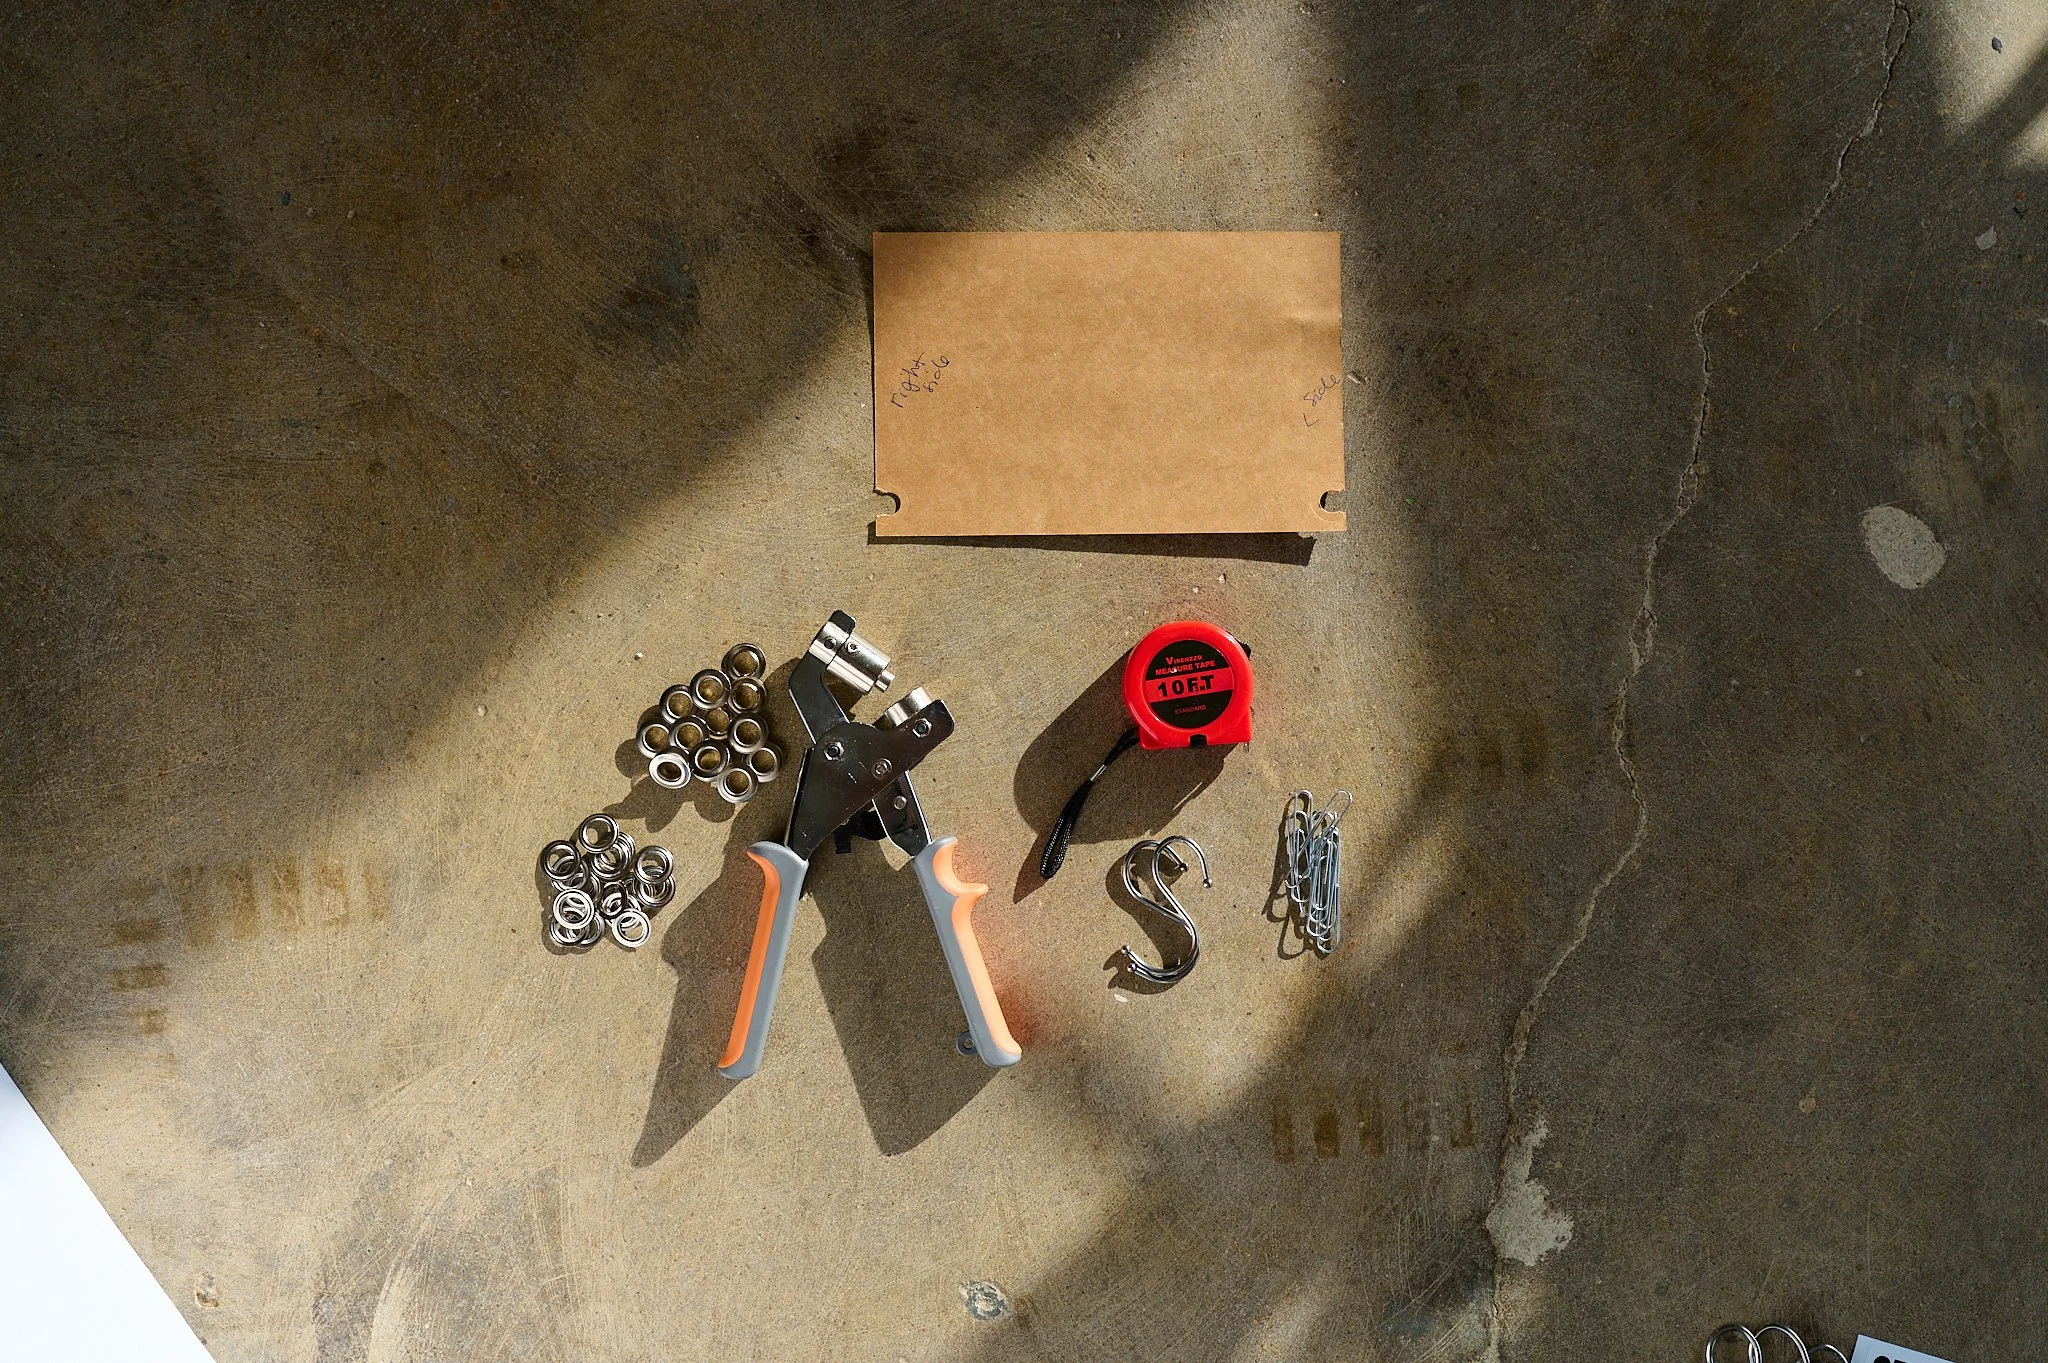
Supplies Needed:
Post-Its or Paper
Measuring Tape
Paper Clips
Alright! Grab your backdrops and let’s get moving!
STEP 1: Hanging Orientation
To hang our backdrops, we need to decide where and how we want to hang our backdrops.
Vertical? Horizontal? Both? These are all great choices.
Today we will be hanging ours vertically.
We ended up measuring 8.5 inches in from each top corner to get the grommet placement we liked.
Reminder: These measurements aren’t set. Put your grommets where ever you feel is right. This is just what worked for us. 📏

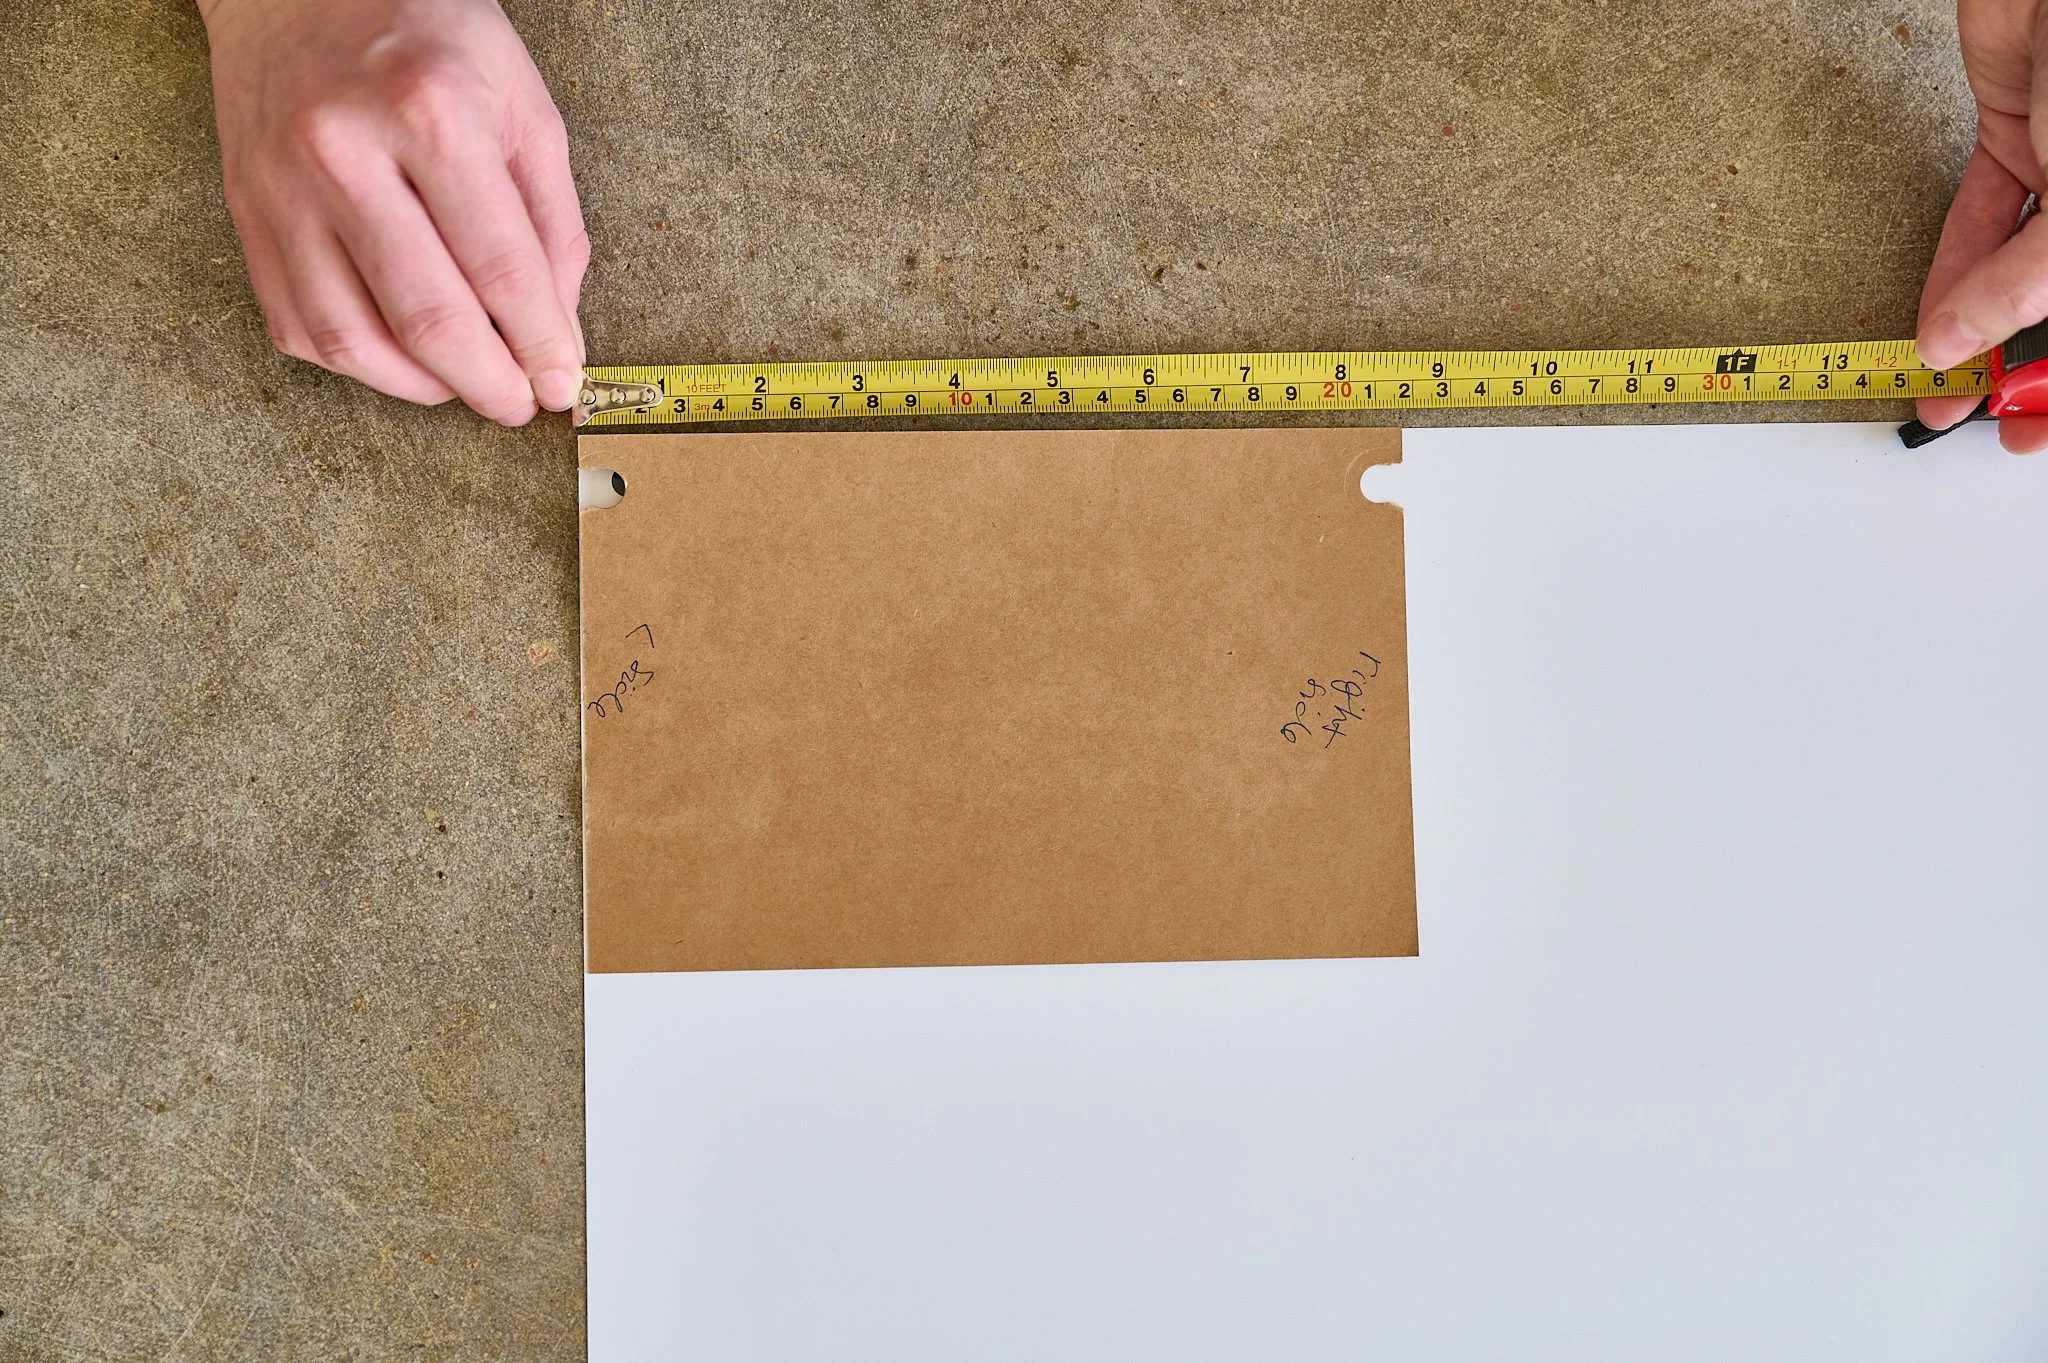
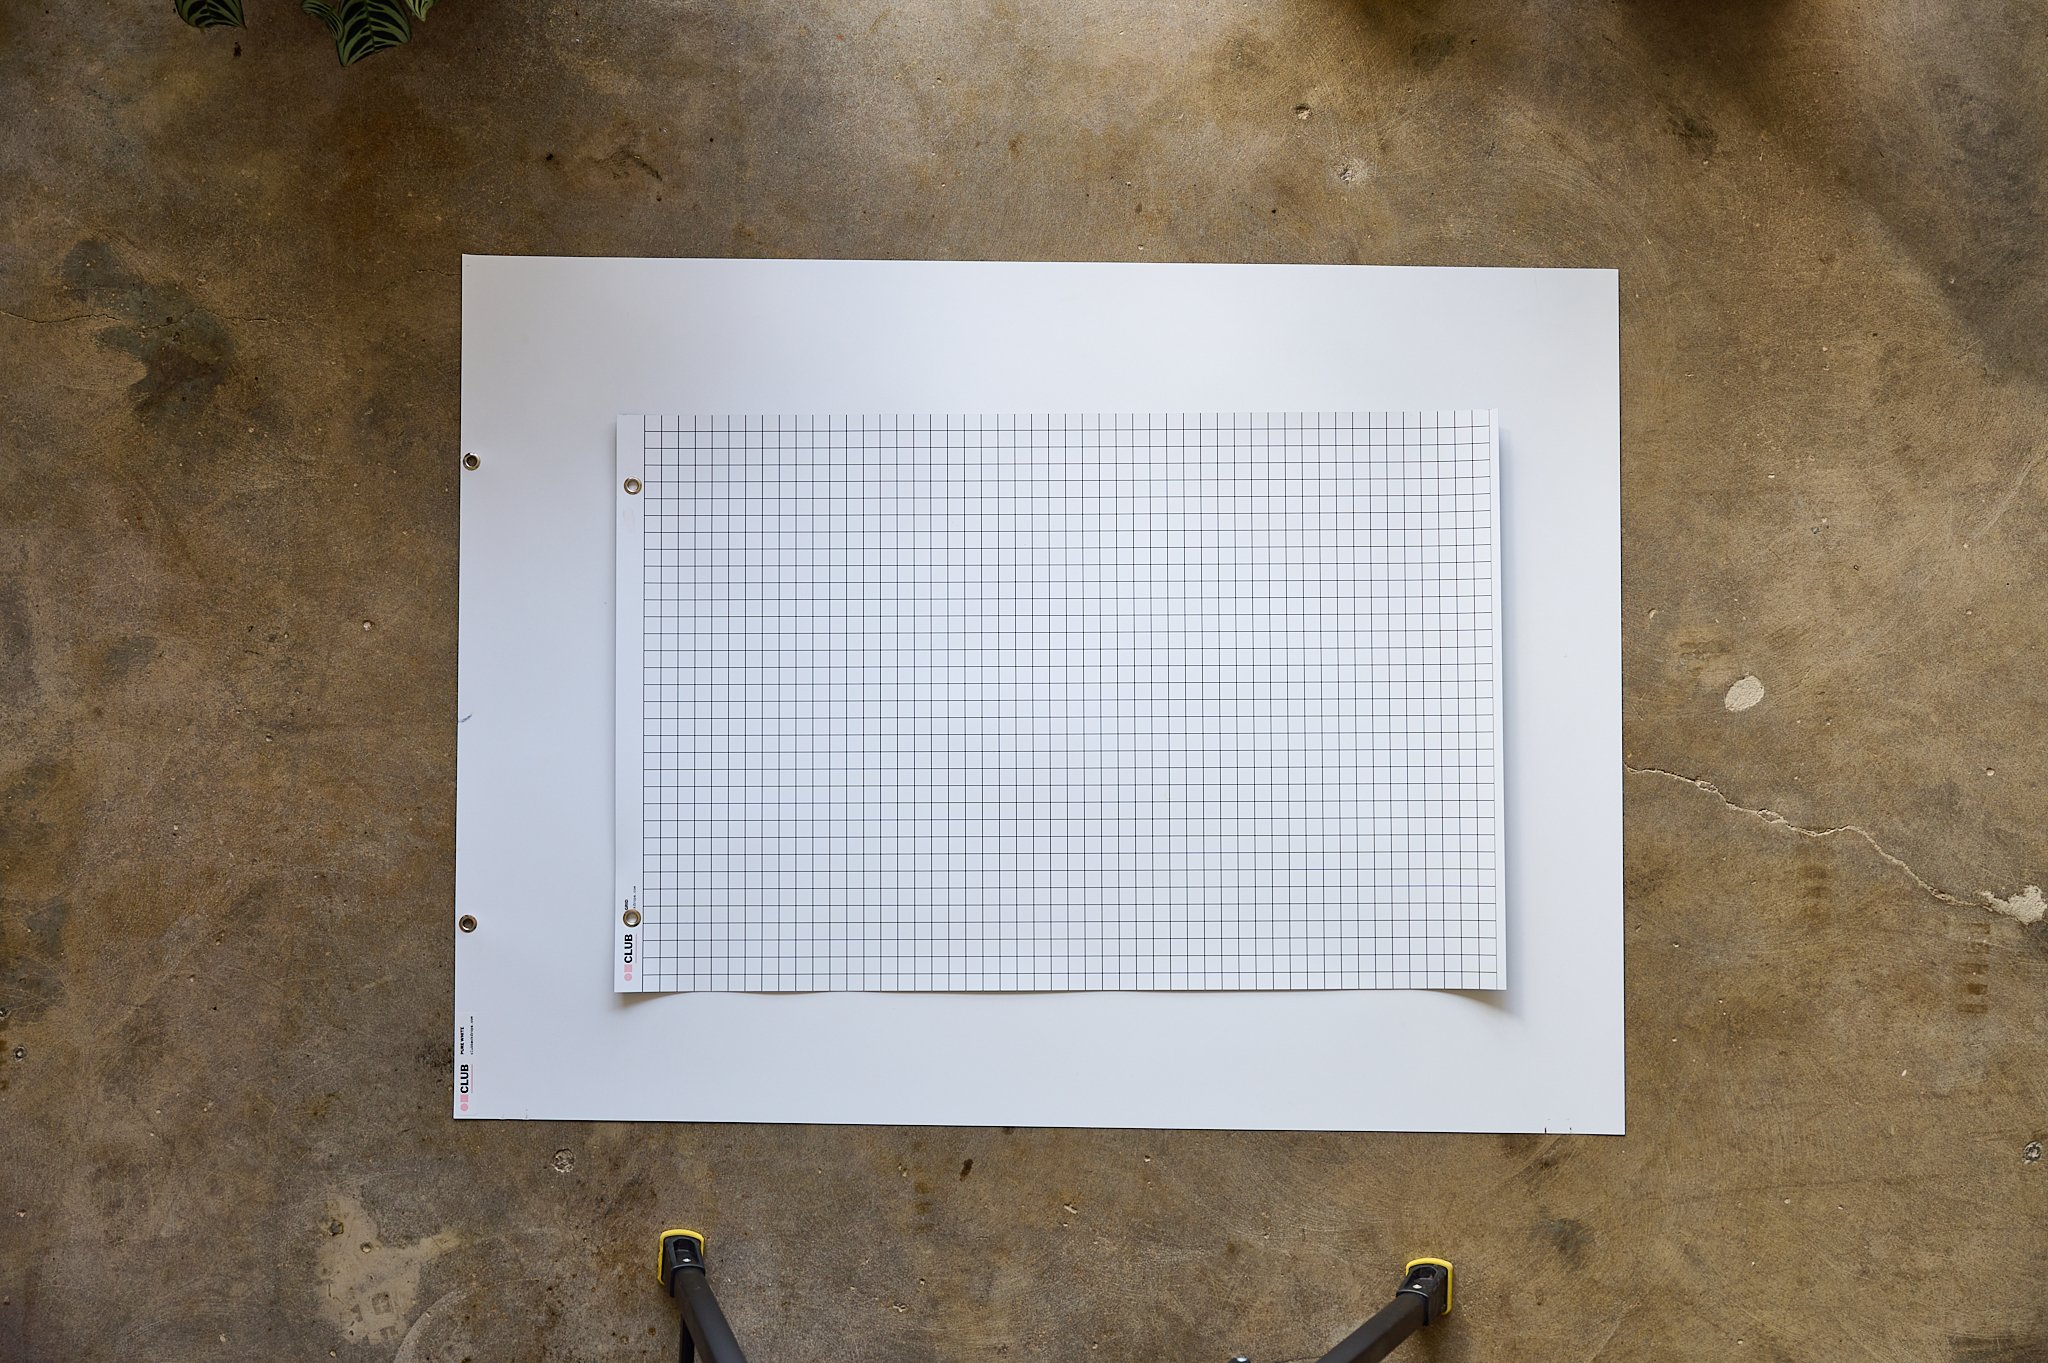
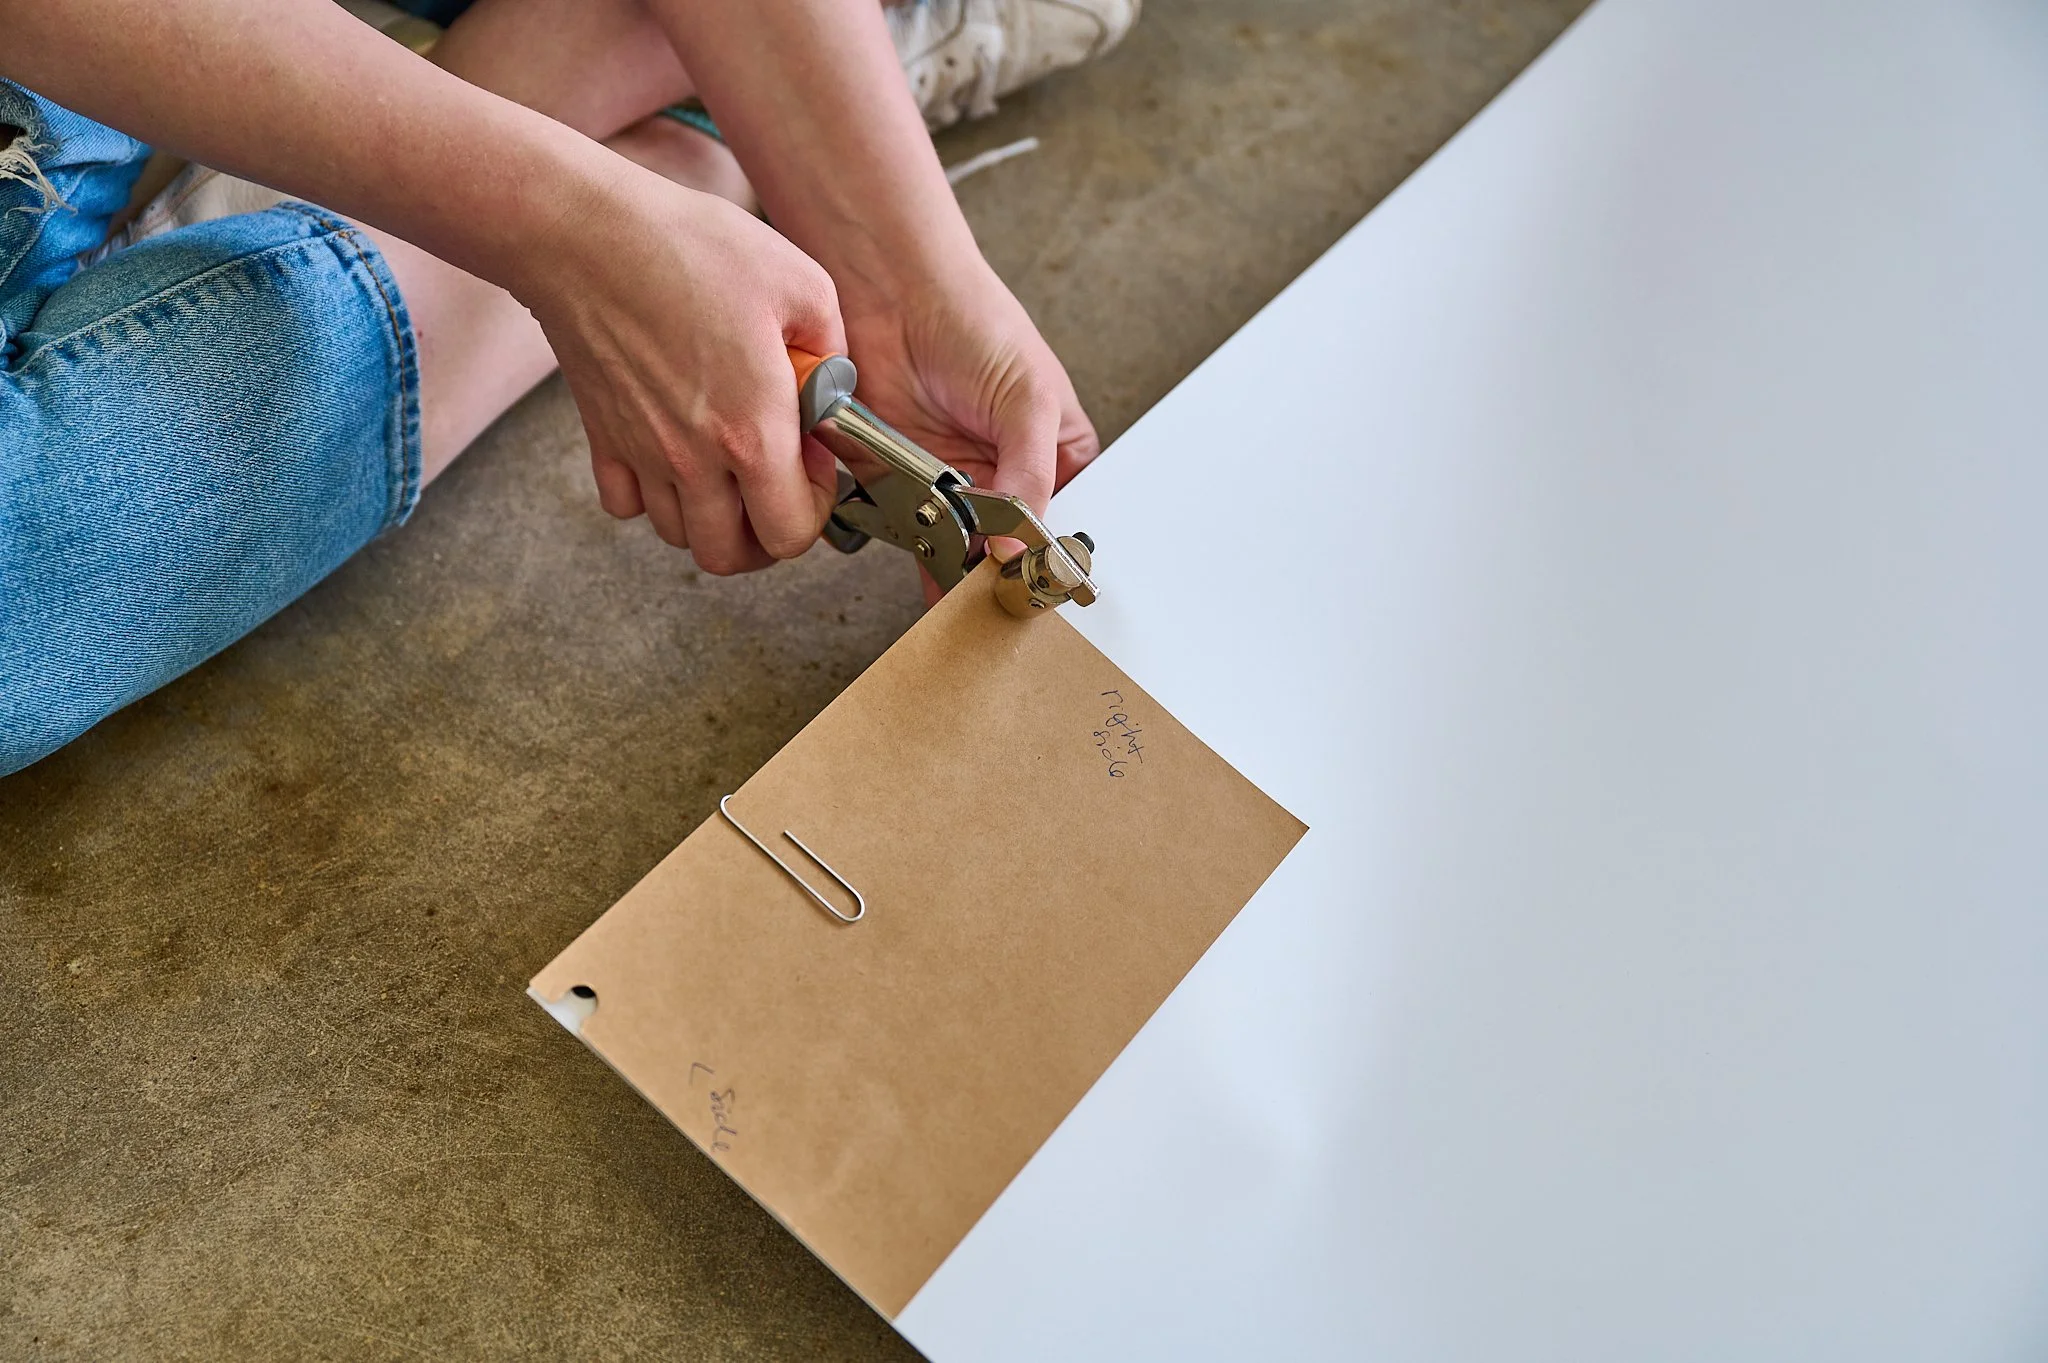
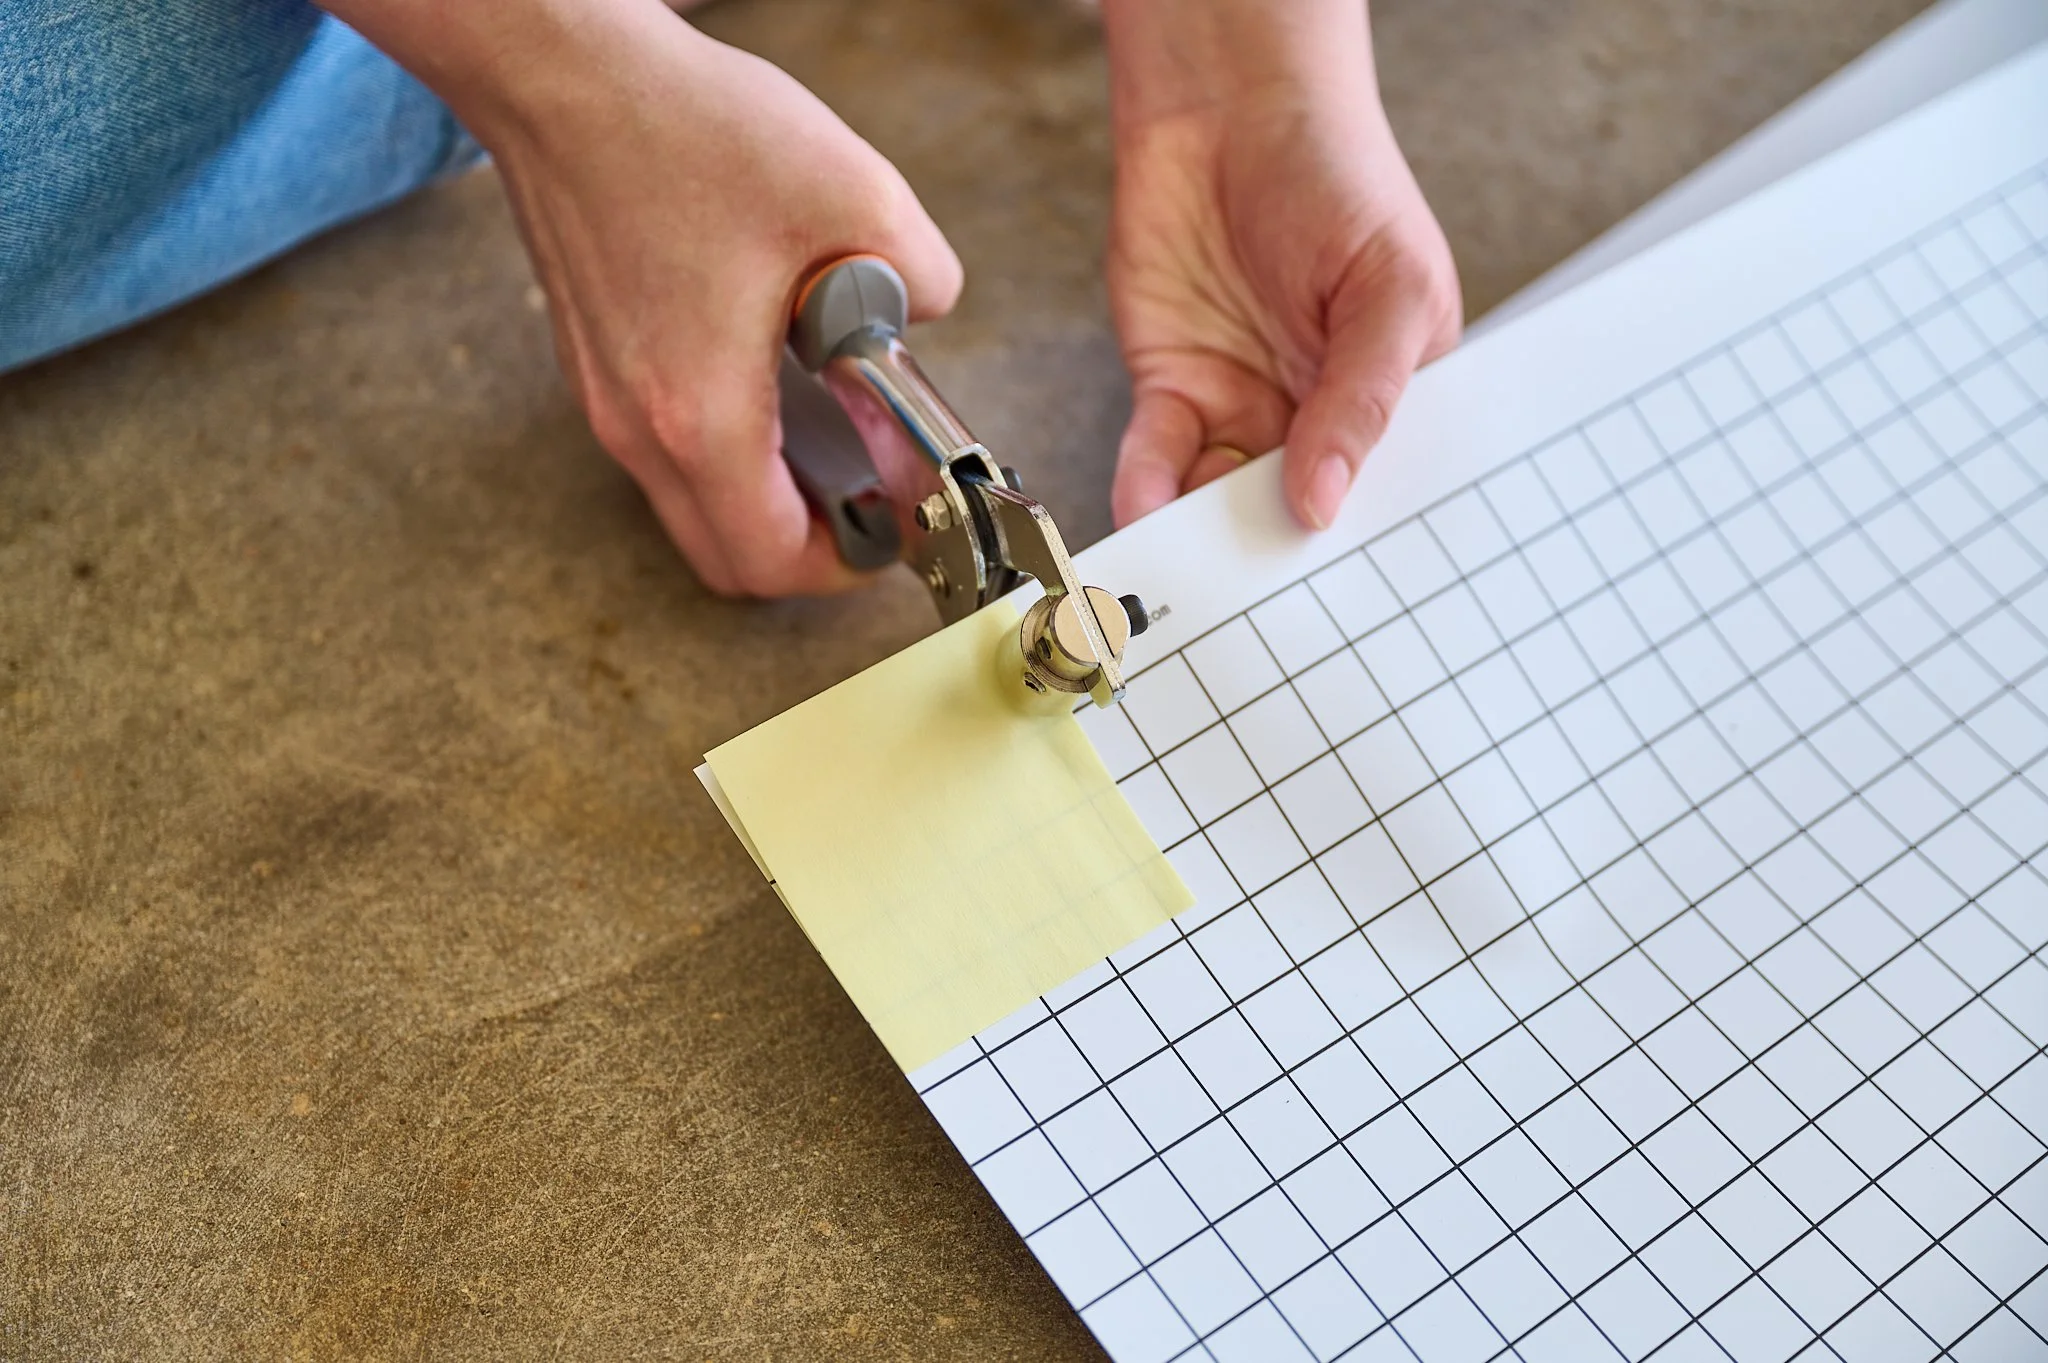
Now that we have our grommet placement measurement, lets make a template.
We cut the paper template to 8.5 inches then placed it at the corner edge of our background, securing it with a paper clip.
We just happened to have a piece of card stock laying around that we used for this but you can use whatever type of paper you would like.

Side Bar:
You may say… why not just use a pen to mark the grommet placement? Why do we need to make a template? (I know Michael did.) 😂 I tried that… It became frustratingly hard to see the mark while trying to punch the hole with the Grommet Pliers. Personally I would rather do it right first than have to try and fix the hole because I messed it up. If another way works for you then do it. 😊
STEP 2: Grommet time
Let’s add our grommets!
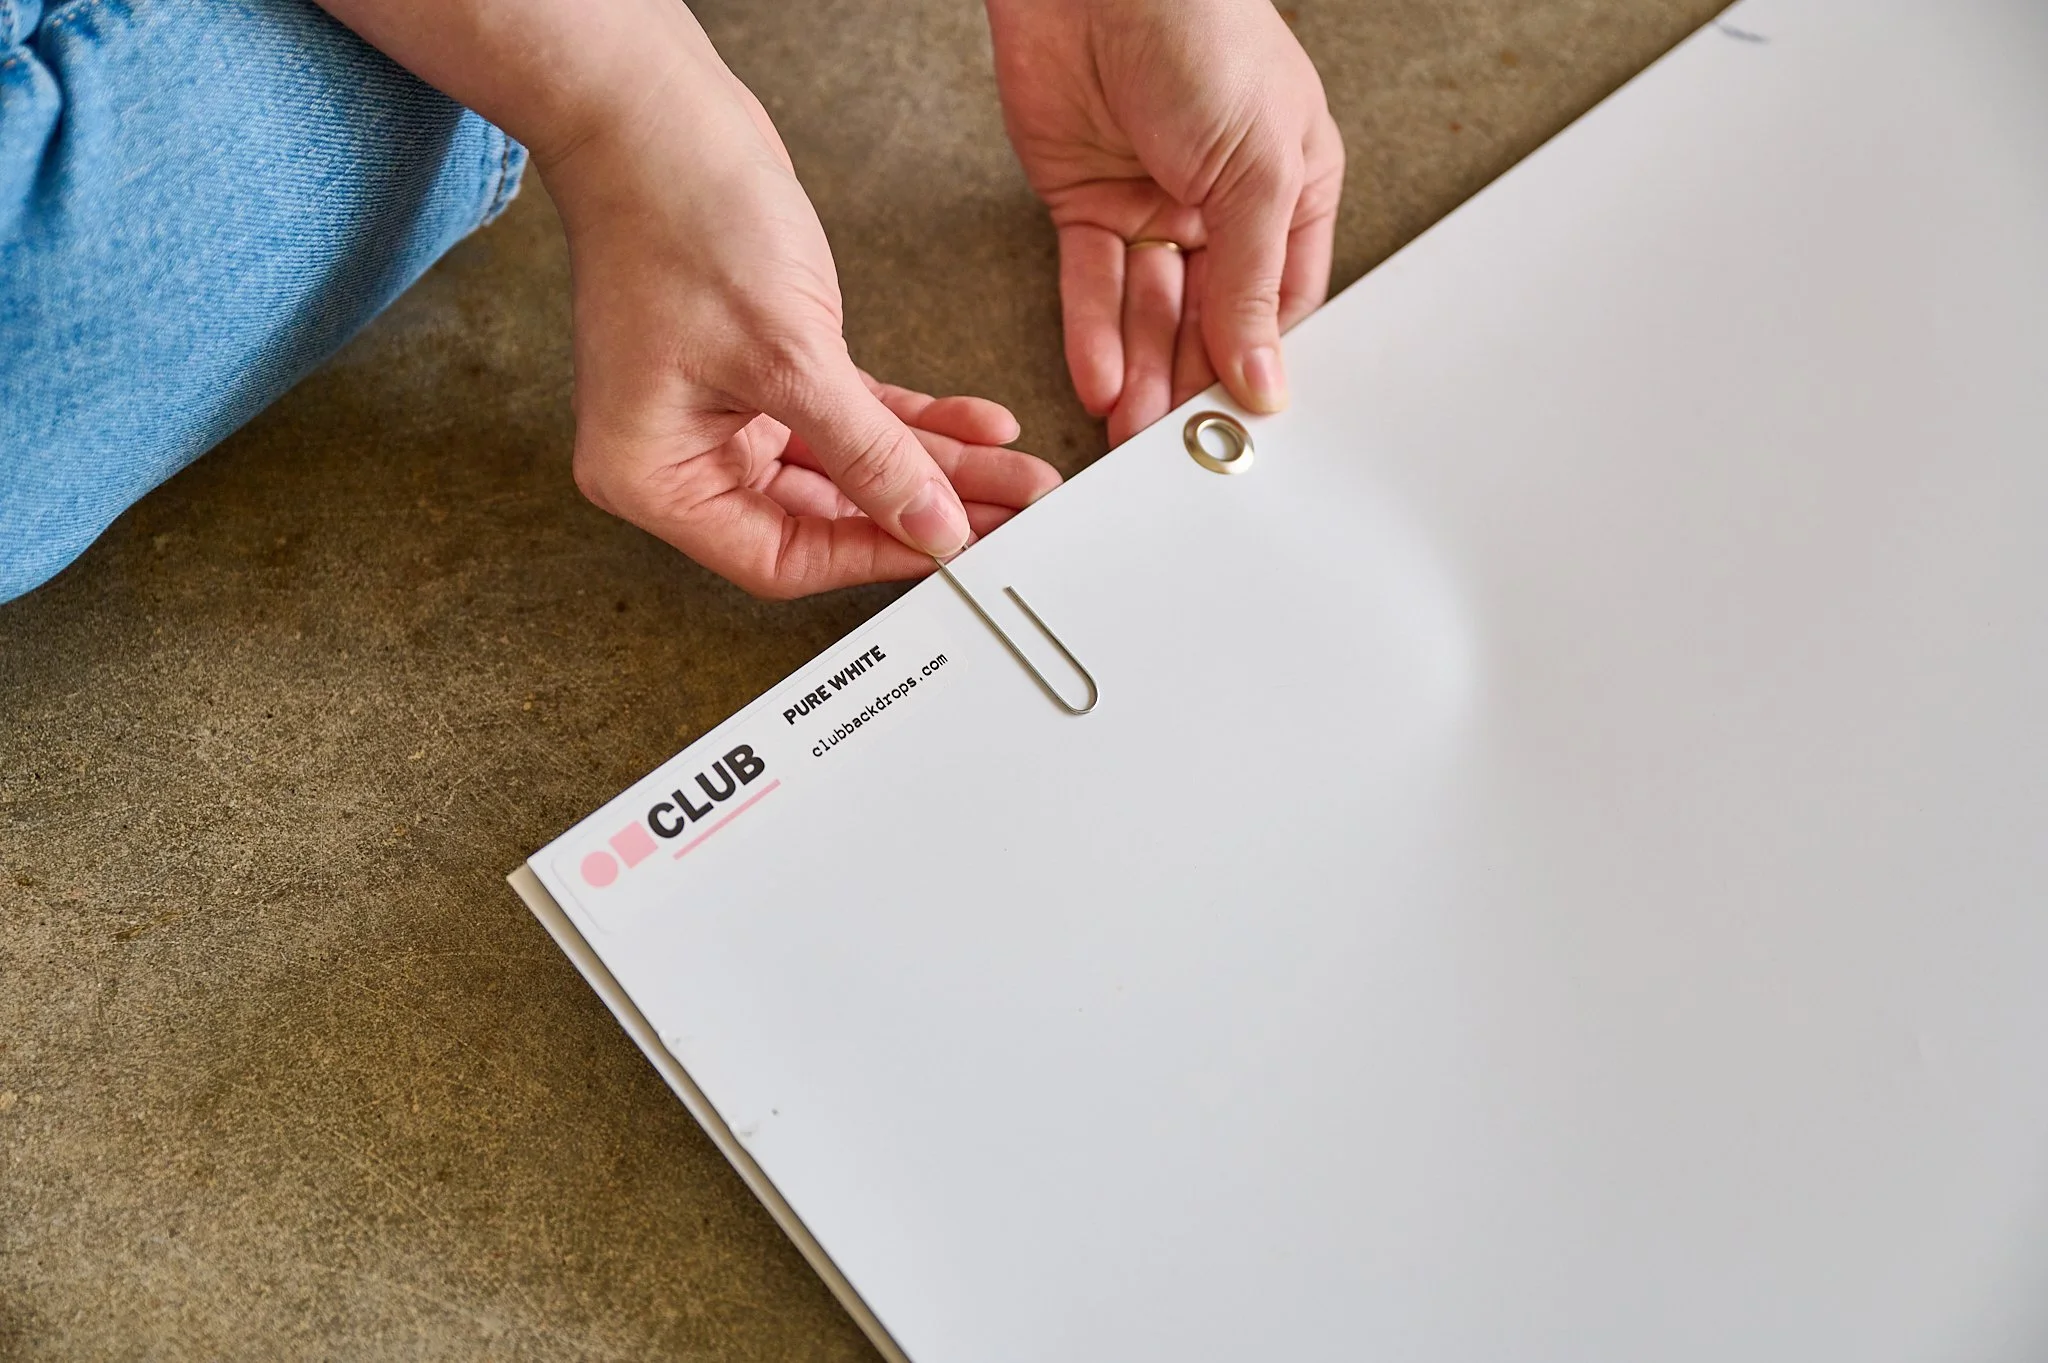
Double-check that your paper template is secured, and decide where you want to place the grommet.
Almost all of the vinyl backdrops we use have a top boarder. I just try to stay within the middle of the boarder. If your background doesn’t have a boarder then just eyeball it. Not too close to the edge and not to far down. About 1/4 of an inch from the top or less.
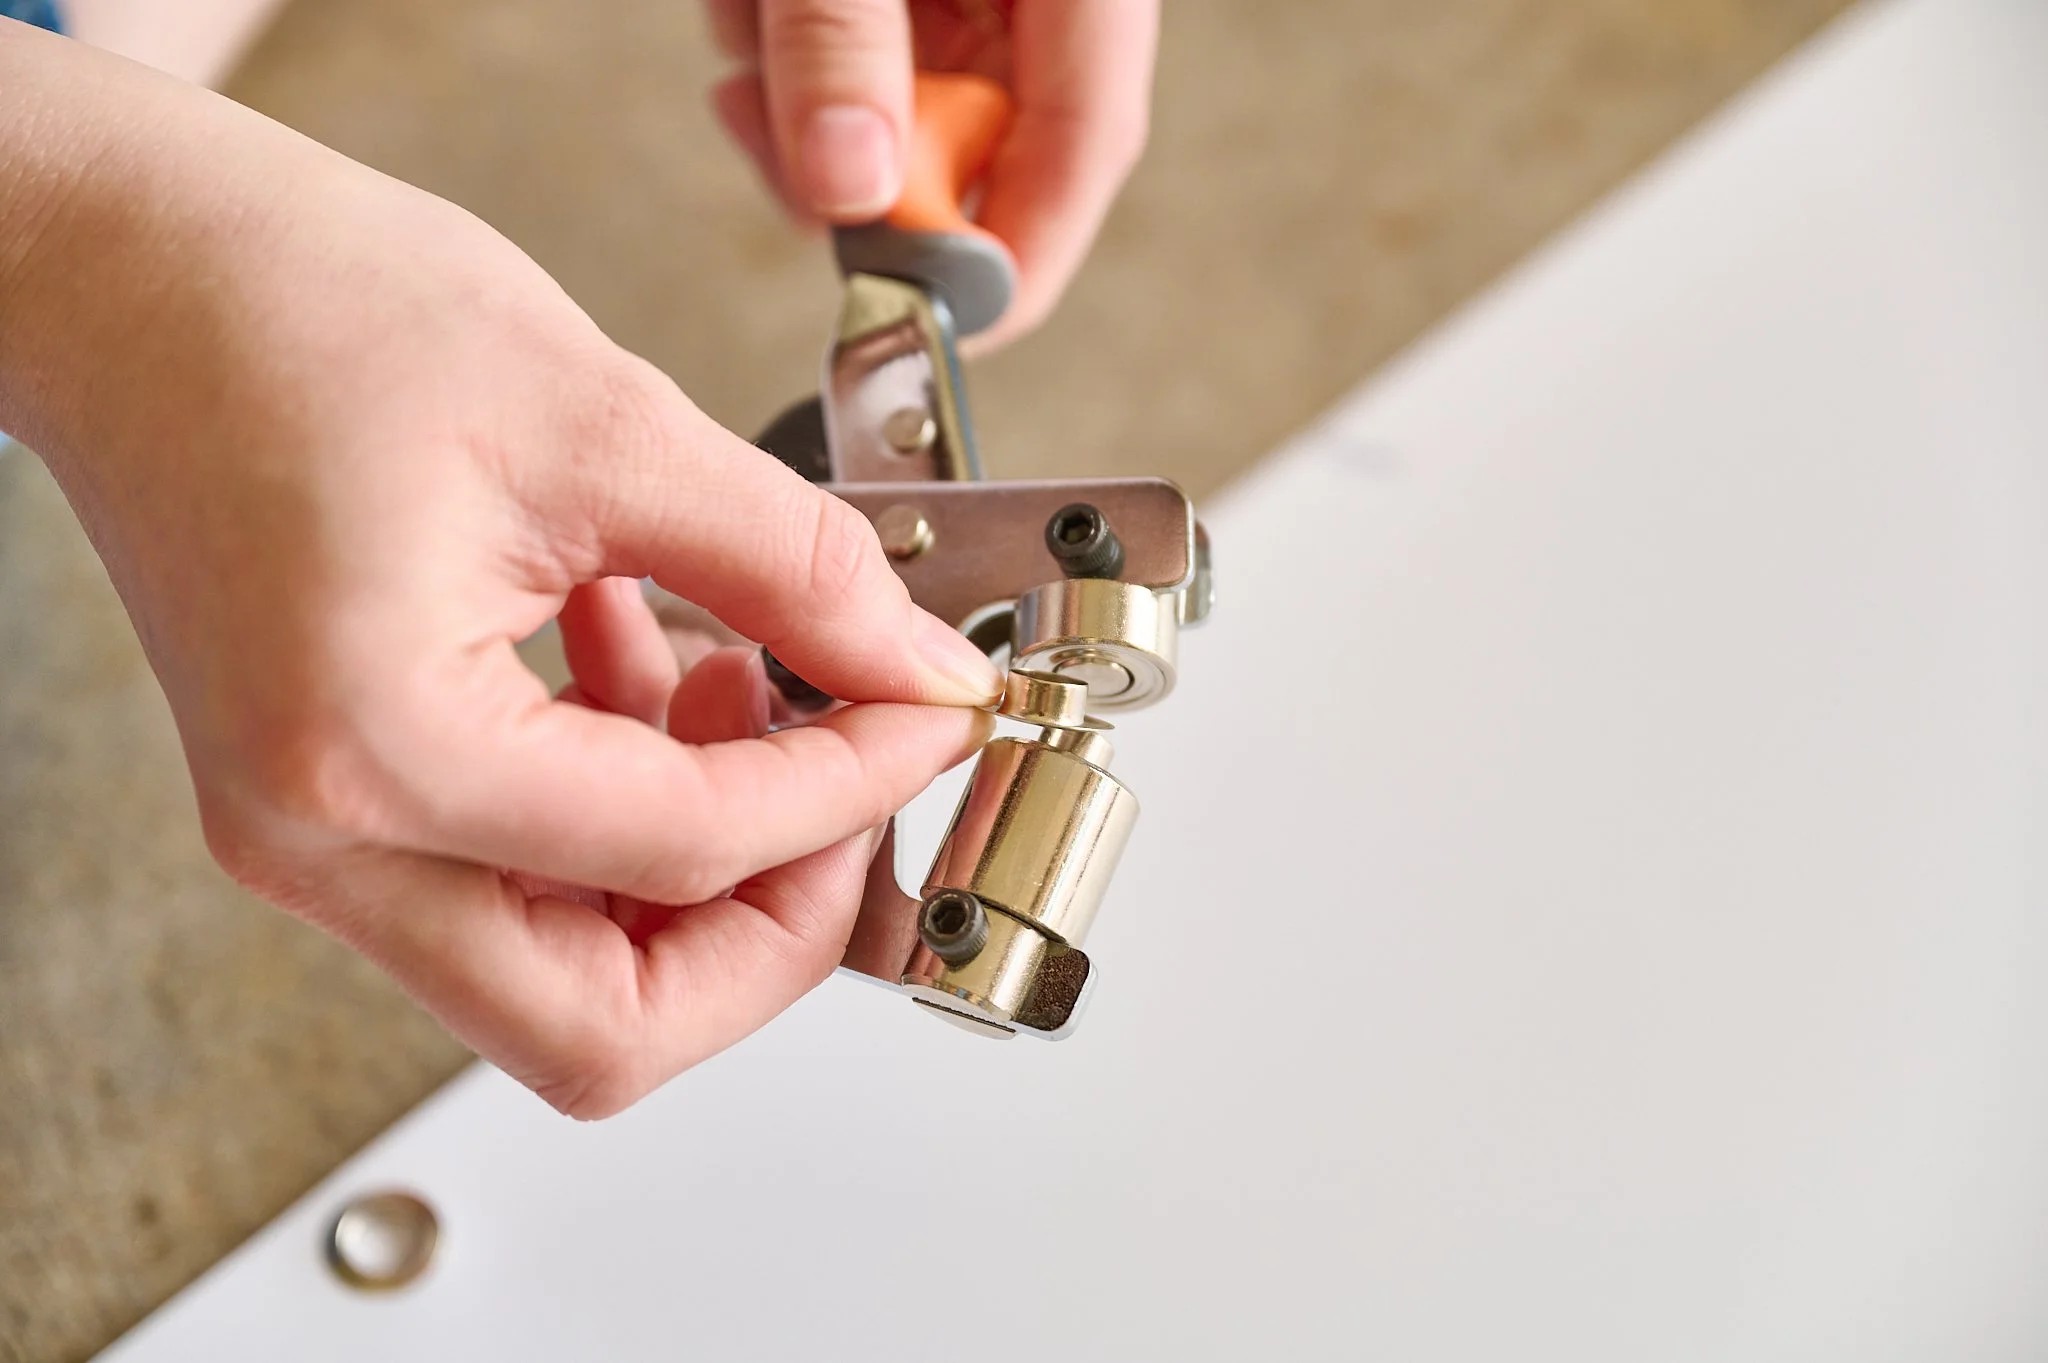
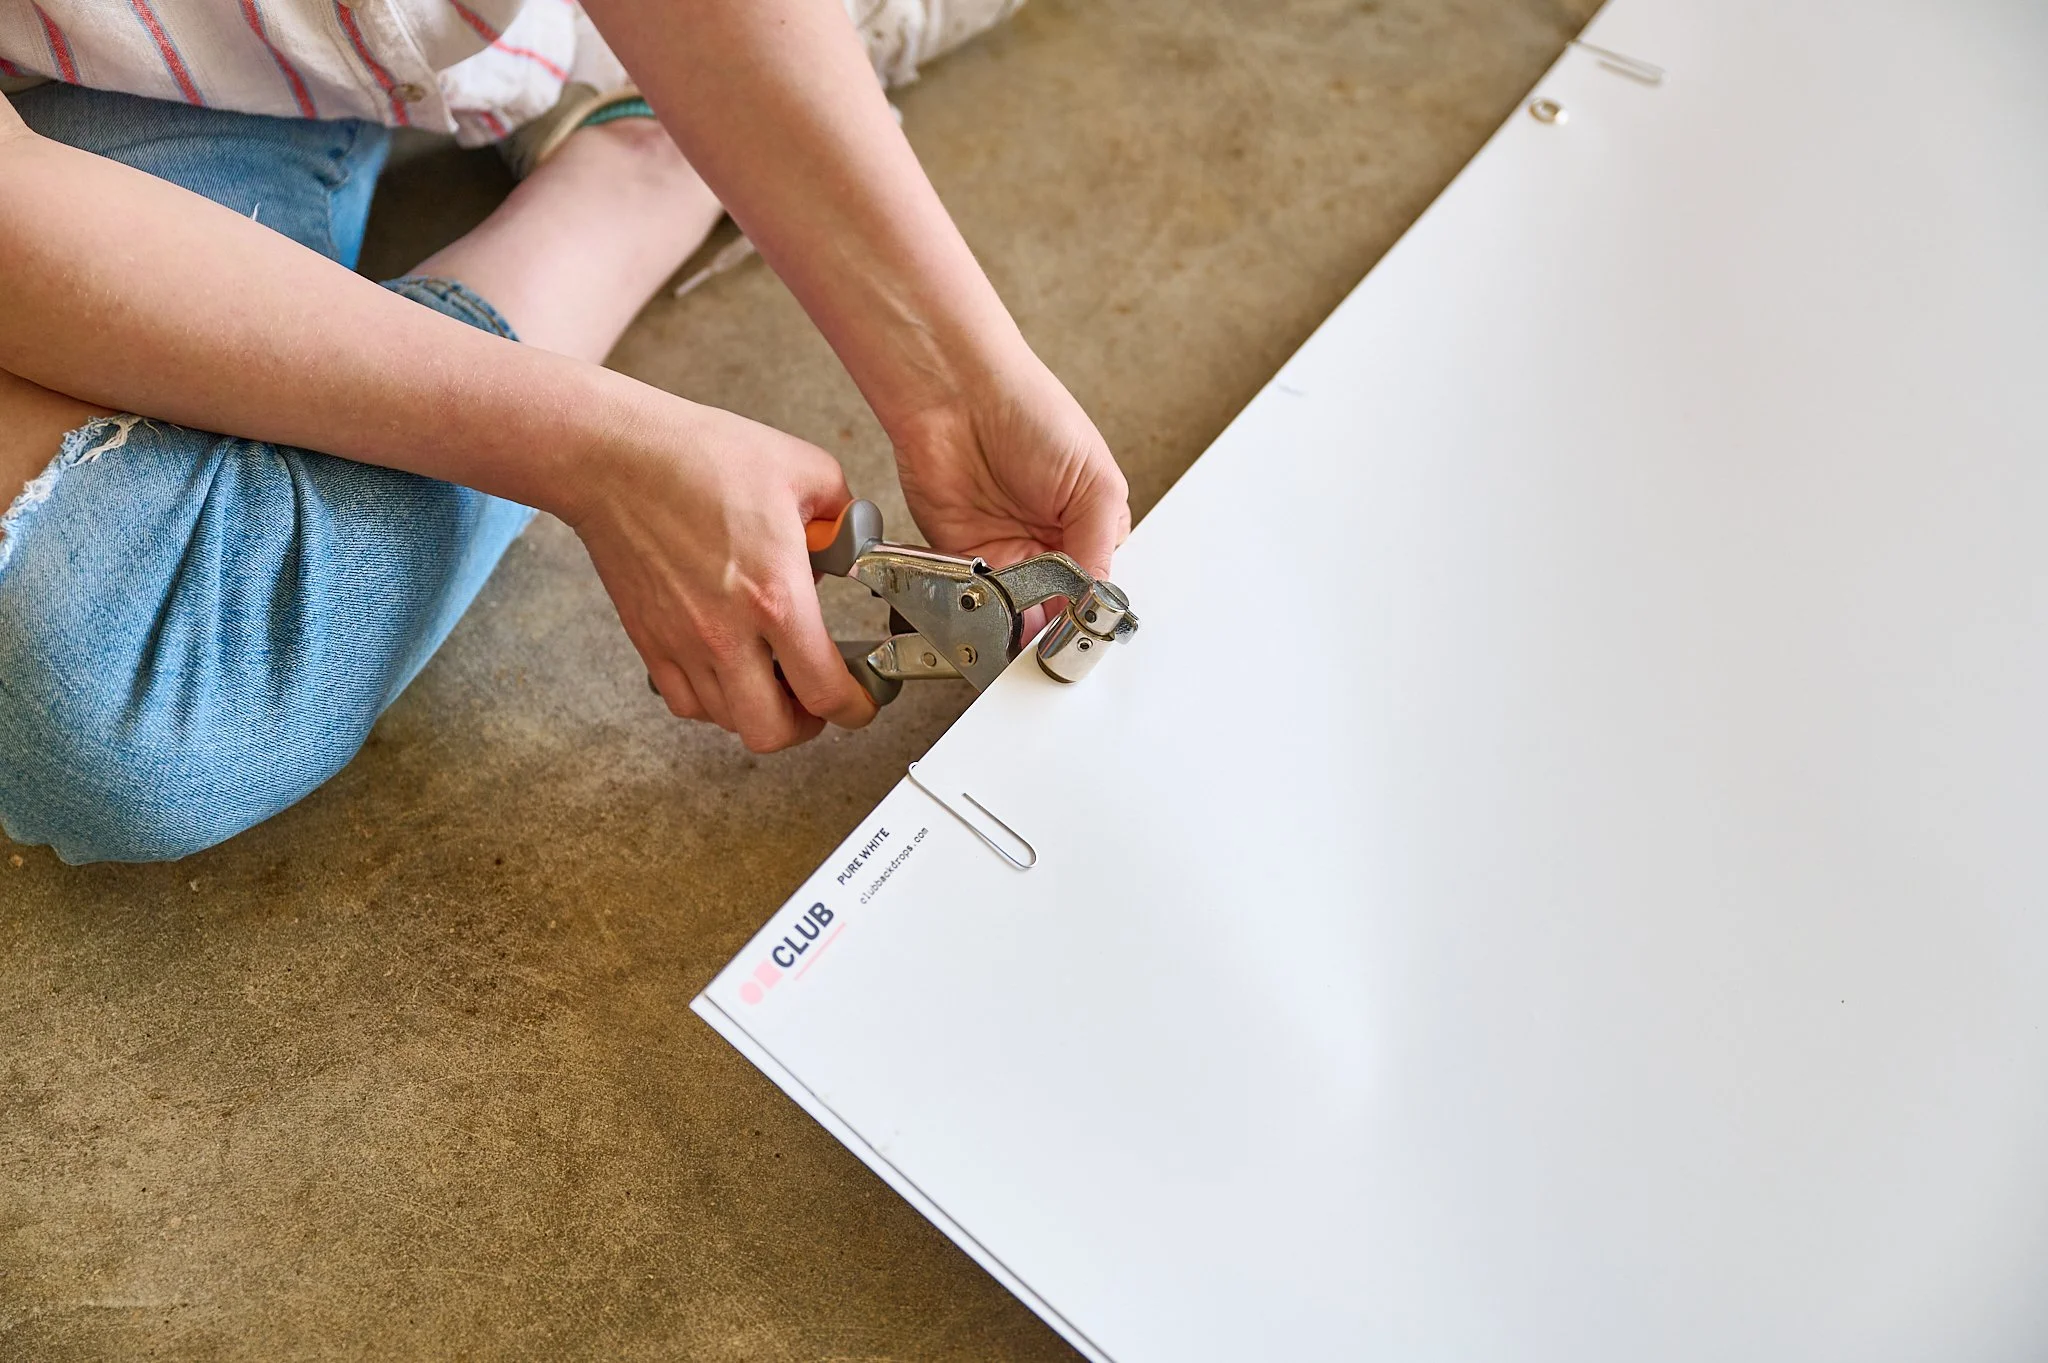
When you are ready, load the Grommet Pliers with the top piece…
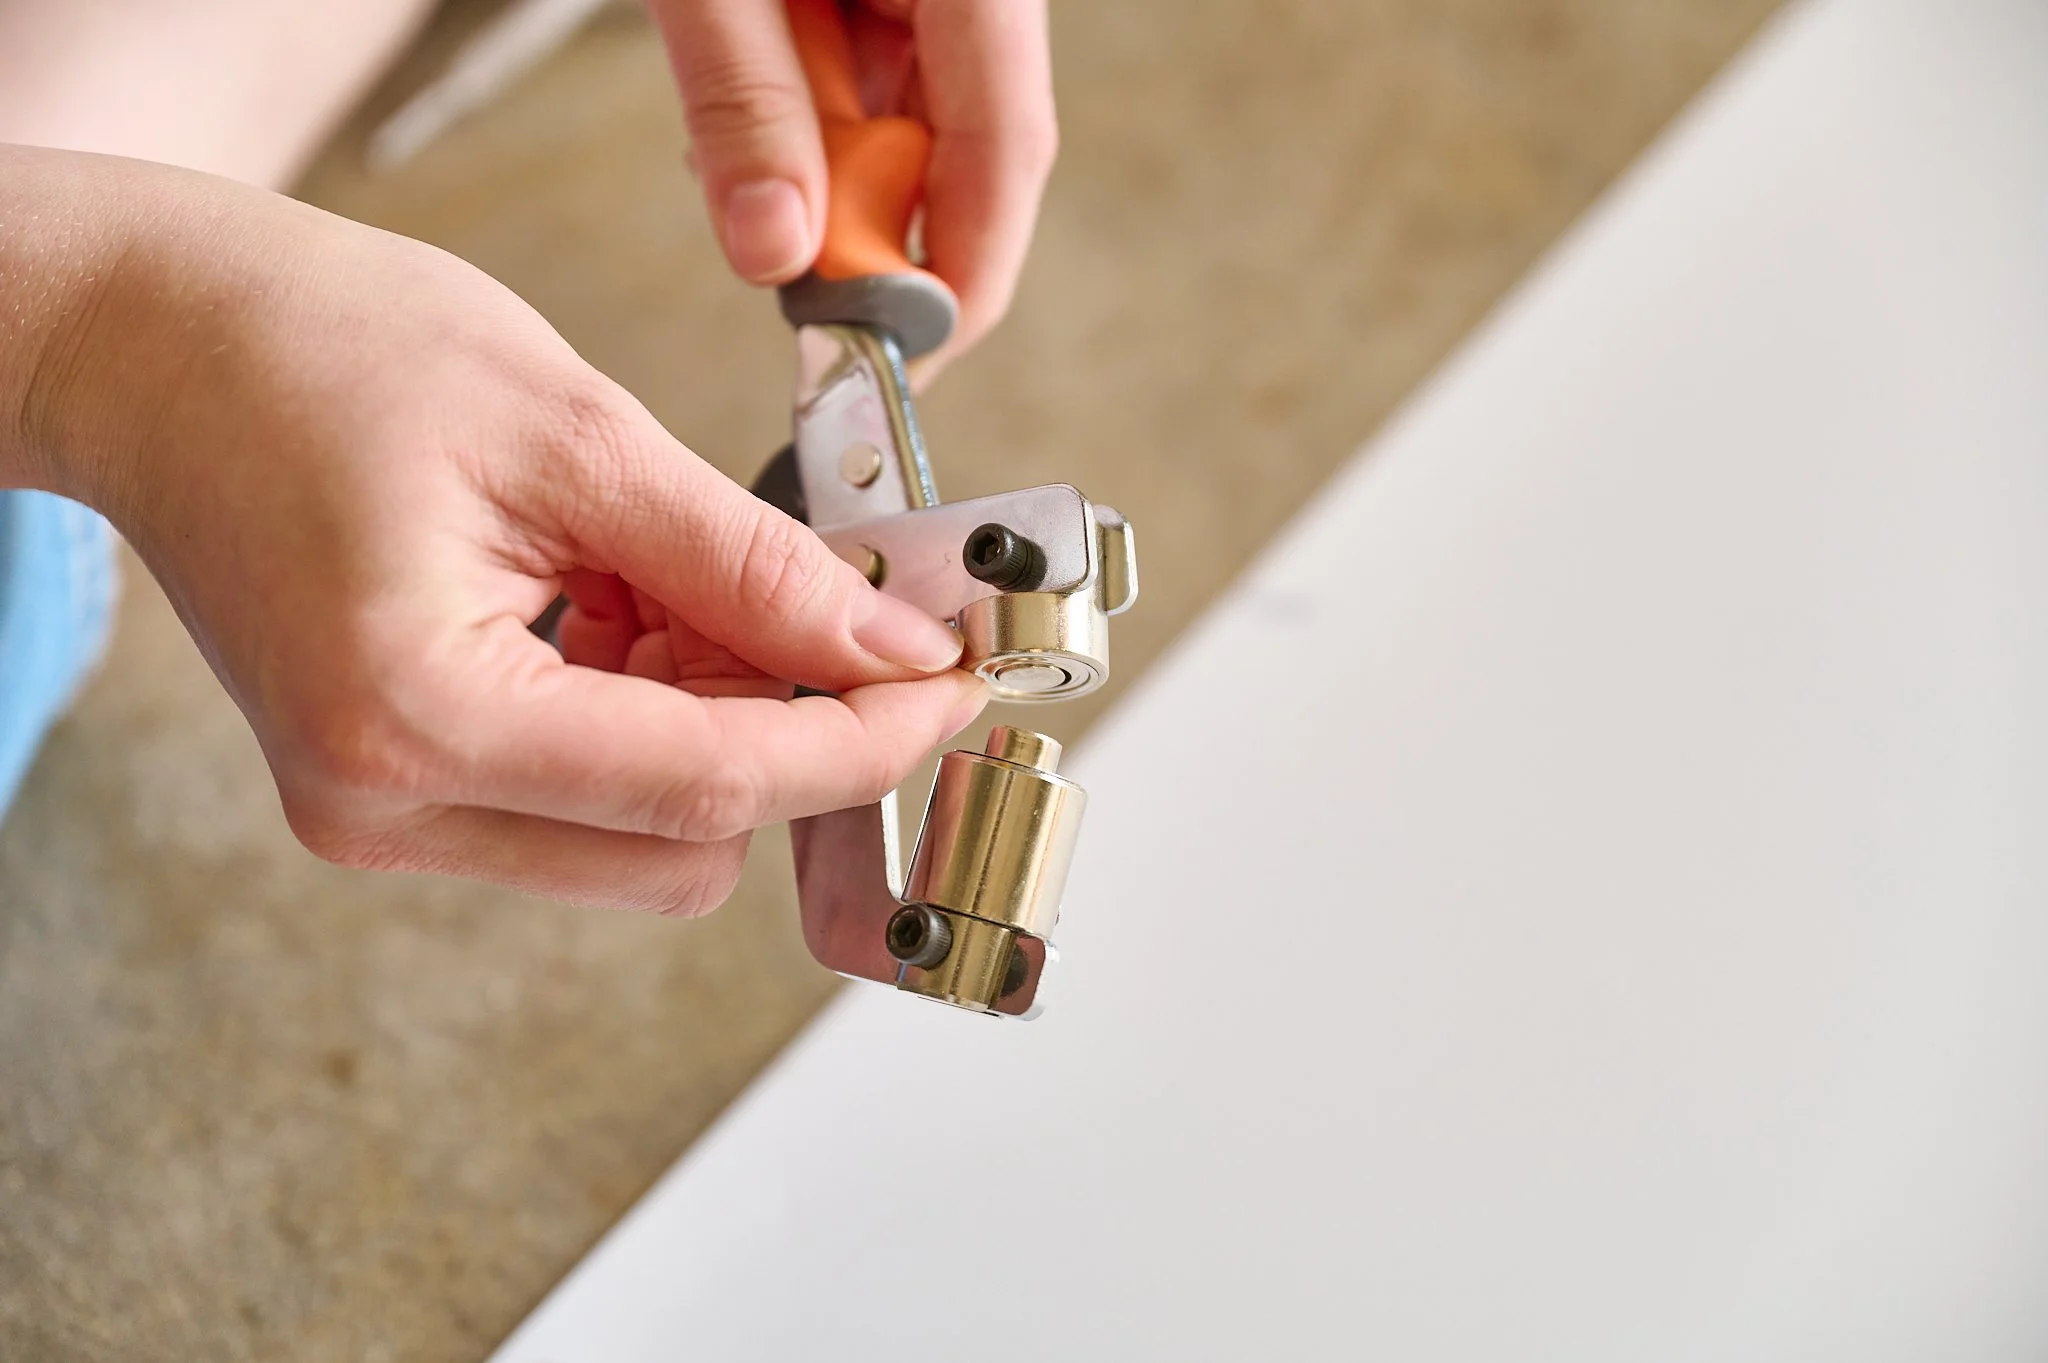
and then the bottom piece.
Line the loaded Grommet Plies up with where you want it and give it a good squeeze!
I like to align it with half of the grommet on the paper and the rest on the backdrop.

Then repeat on the other side of your backdrop.
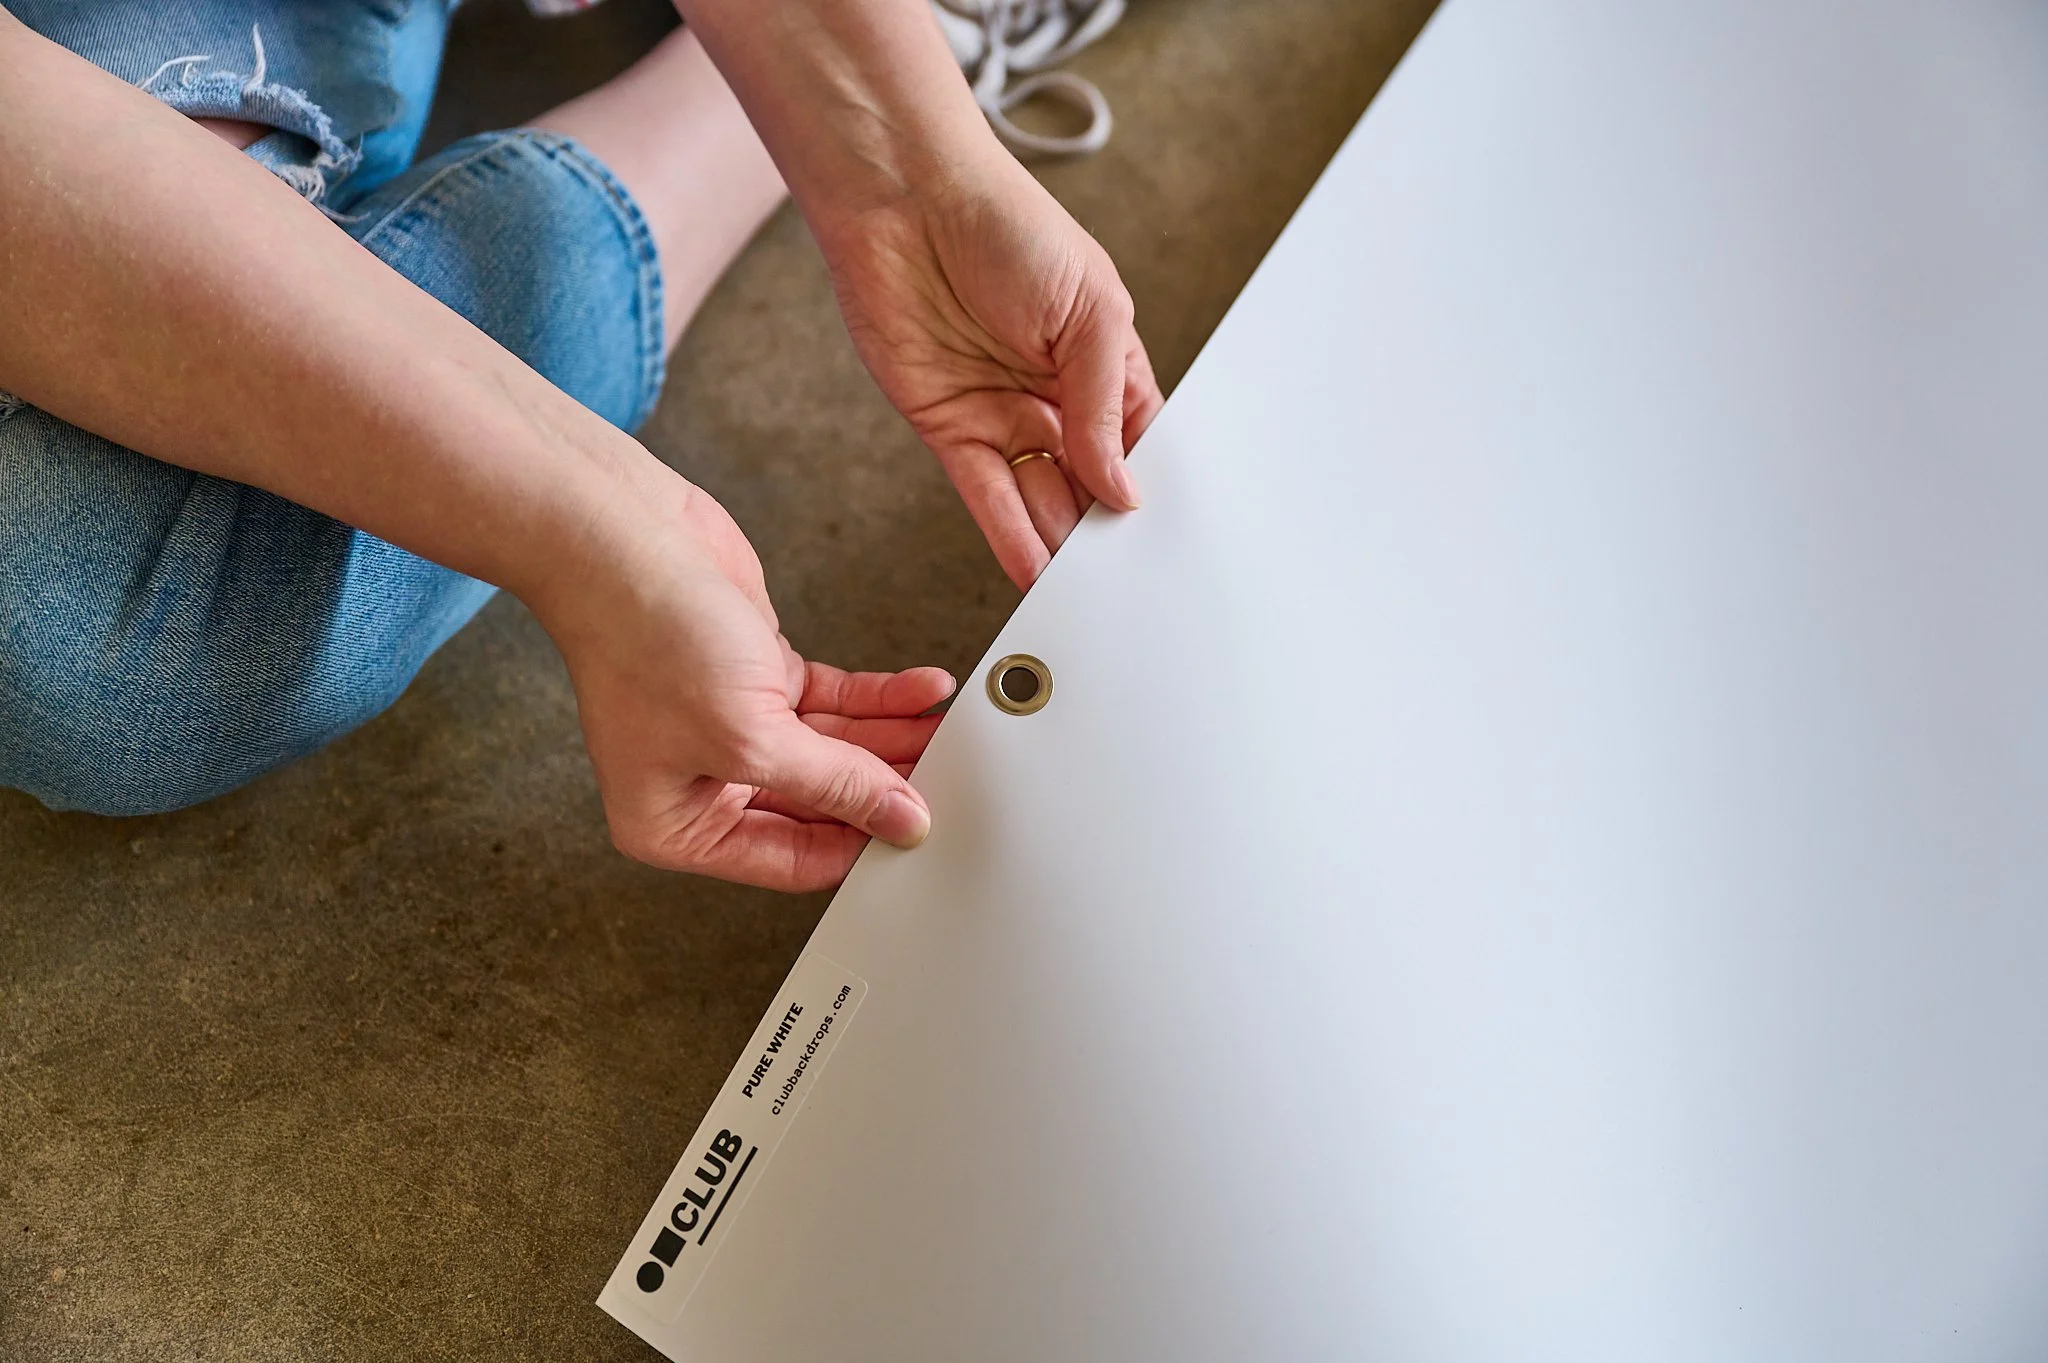
Your backdrop is now punched.
Remove your paper clips and remove your paper template from behind your grommet.
Well… you did it!!
Now repeat the same process as above for the smaller backdrop.
For the smaller backdrops: 60 x 90cm, we used a yellow Post-It note as a paper template.

If You Have Multiple backdrops…
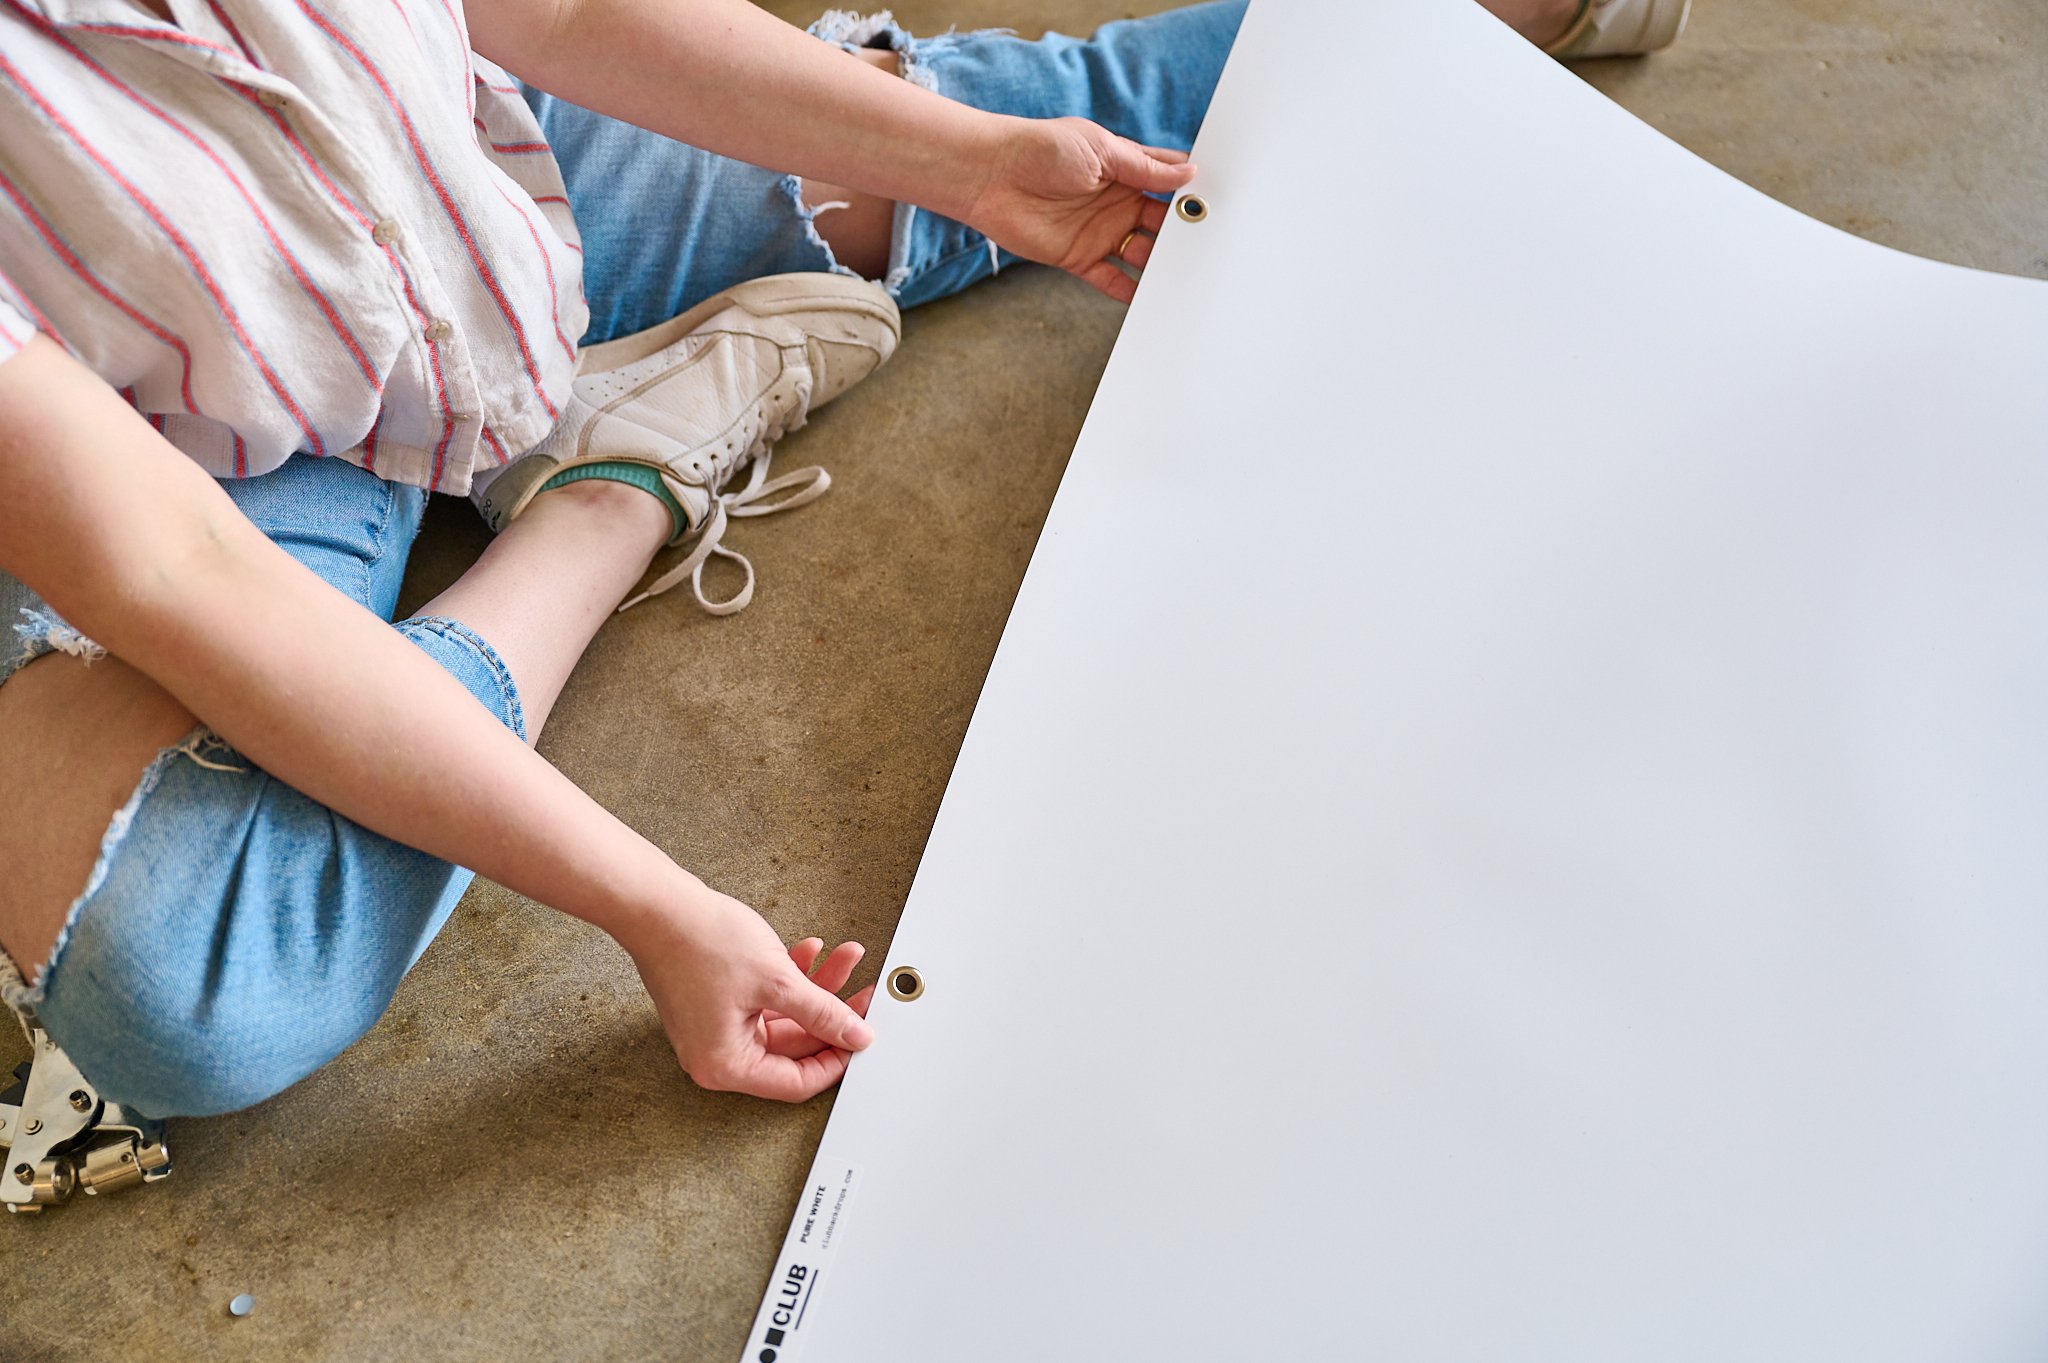
Let’s use the punched backdrop as a template for our other backdrops
STEP 1: Line it up!
Line your punched backdrop over your unpunched backdrop the best that you can.
*Some of the backdrops can vary in size even though they are “the same size”.
If the bottom backdrop is a little larger, center your top backdrop over the bottom one.

STEP 2: Safety first
Secure your backdrops together with paper clips.
STEP 3: make a guide
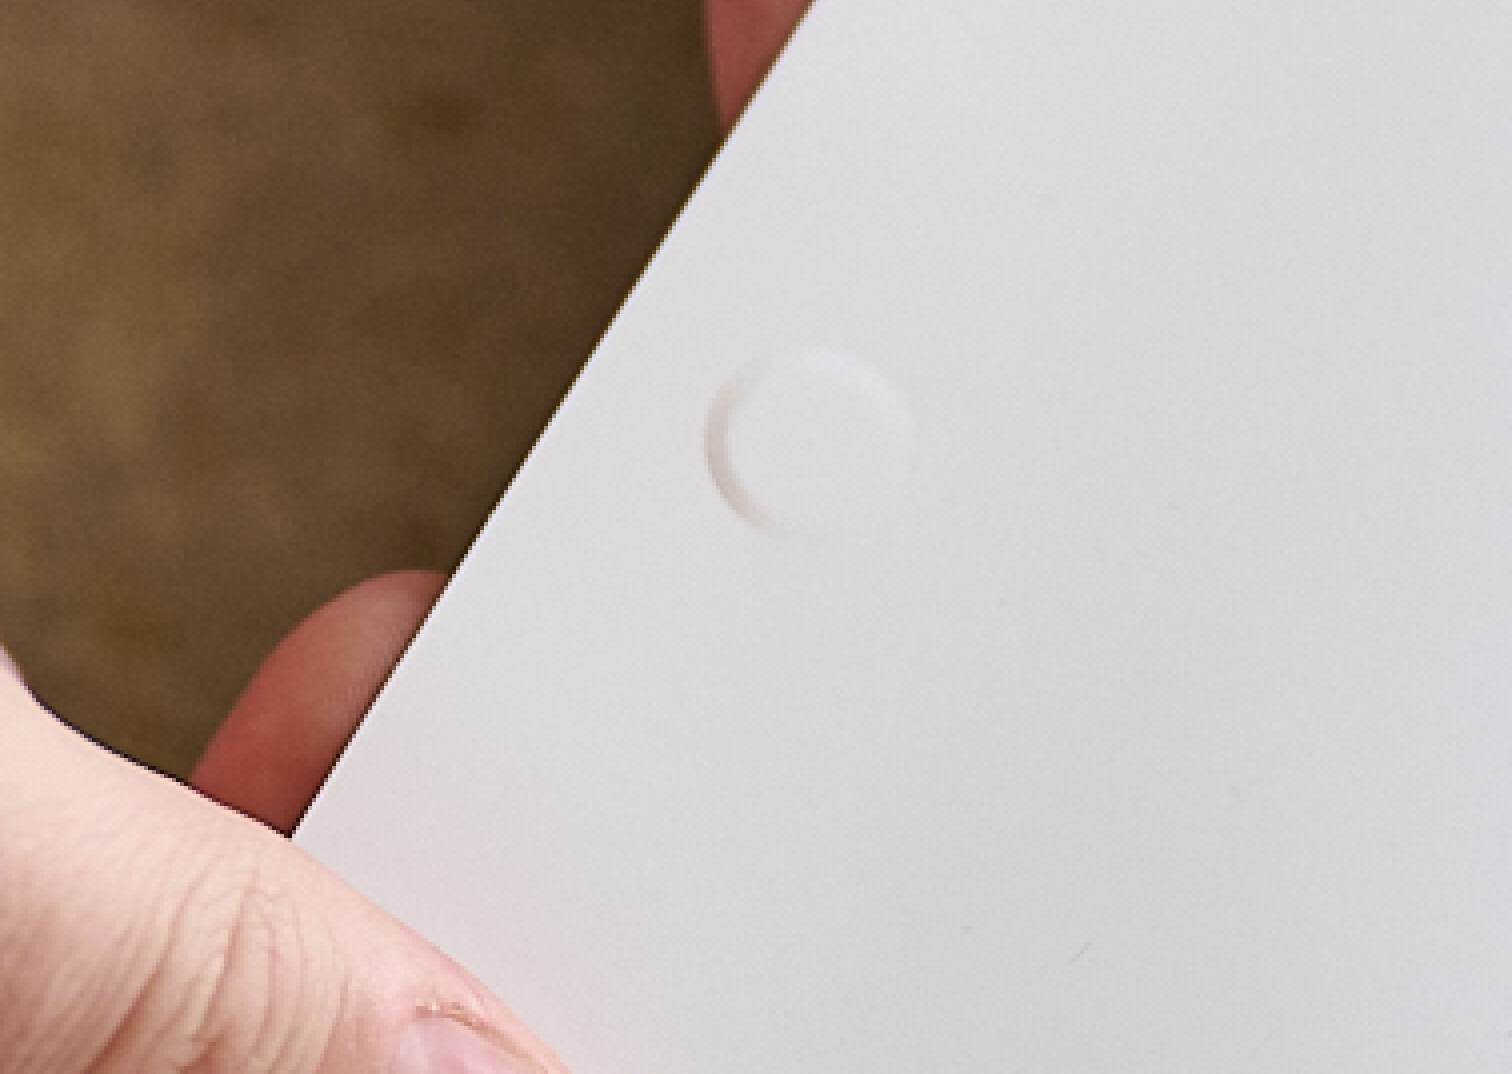
Take your Grommet Pliers WITHOUT any grommet pieces loaded into it and gently squeeze (not fully squeezing) the pliers into the already punched hole to make a imprint on both sides of the unpunched background behind it.
*WARNING* be gentle doing this!!! We are not puncturing this. We are just making an imprint. IF YOU SQUEEZE TOO HARD YOU WILL WRINKLE THE BACKDROP!!
STEP 4: The reveal!
Remove the paper clips and the top backdrop. After removing the top backdrop, you should see a circle imprint.
We will use this as a marker for our grommet punch.
STEP 5: Punch it!
Load your Grommet Pliers with the grommet pieces like we did earlier and center the pliers over the imprint and squeeze.
REPEAT the same process for the other side.

STEP 6: Drumroll please…
Now stand back and take a look at your NEW hangable backdrops!
Man, You really did it! you killed it!!

Storage
Now that all of your vinyl backdrops are grommeted up, you gotta keep them organized and out of the way.
One of our favorite ways to keep our backdrops organized is hanging them on the wall or on a garment rack when they are not used.
For hanging them on the wall, we found these Wall Mounts that worked perfectly for us!
The grommets we use are 10mm wide, so you should be fine if the mounts are smaller than the grommet.
* If you go this route, ensure you use wall anchors for safety. We have 25+ pieces of vinyl on each hook, and it’s probably at its weight capacity.
Another option is hanging your backdrops on a garment rack using pants hangers. :) Make sure the rack is tall enough.
💪 🚨 Vinyl Challenge 🚨 💪
Show us what you got!

When you're ready to show off your handiwork head over to Instagram and post on your Stories! Don't forget to tag us so we can give you a shout-out! 📣
-
Step 1: Download the graphic below
Step 2: Add graphic to your IG Story
Step 3: Add your photo on top
Step 4: Tag @HaasHouse_